Mastering different heat tools is no easy feat, and it can leave you tempted to put hairstyling on the back burner. One tool that can be particularly difficult to master? Your blow-dryer. With so many blow-dryer attachments available, it’s easy to get overwhelmed and opt to rough dry your hair instead. Looking to brush up on your blow-dryer knowledge? Below, we’re sharing the details on three hair-dryer attachments you likely already have sitting in your bathroom cabinet and how you can to use them—along with a product rec to go with each, of course!
ATTACHMENT #1: THE CONCENTRATOR
First up, we have the concentrator or the nozzle. This is the attachment that’s narrow and elongated in shape. Your blow-dryer may even have more than one of these in different sizes. The concentrator is used for exactly what you’re thinking: concentrated, focused blow-drying. It gives you more control as to the specific area you want to blow-dry and the direction you want the hair to blow, as opposed to having your strands flying every which way. This is ideal for blow-drying hair straight. Since it applies more pressure to one area in particular, it also speeds up drying time. Score!
How to use it: Since the concentrator attachment creates targeted airflow, try using it when looking to give your roots a boost of volume. First, apply the L’Oréal Paris Advanced Hairstyle BOOST IT Volume Inject Mousse to damp roots. Then use the concentrator attachment to blow-dry your roots and make the most of your volumizing hair mousse.
ATTACHMENT #2: THE DIFFUSER
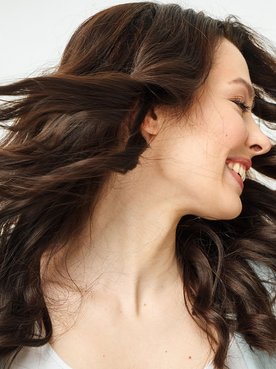
Calling all curly-haired girls: This attachment is for you! You may recognize the diffuser as the bowl-shaped attachment adorned with tiny combs sticking out along the edges and small holes throughout. The diffuser is designed this way to allow air to flow through the attachment, rather than having it all hit your hair at once. This dispersing of air quite literally diffuses the most unwanted potential side effect of blow-drying your strands: frizz!
How to use it: The diffuser is perfect for giving curls a bouncy, frizz-free appearance. After attaching yours to the end of your blow-dryer, set it to the side for a minute. Then work the L’Oréal Paris Advanced Hairstyle CURVE IT Elastic Curl Mousse throughout damp hair. Flip your hair, so you’re bending forward with your hair falling over the front of your face. Pick up your hair-dryer once more and start to blow-dry your curls using the diffuser. Point the blow-dryer downward to help minimize frizz.
ATTACHMENT #3: THE PICK
The last attachment that commonly comes with blow-dryers? The pick! This is another attachment you may even already have in varying sizes. The pick is exactly what you’re picturing: A comb-like attachment you can work through your strands whilst drying. The result? More volume! Shorter picks are ideal for those with shorter hair, while longer picks work best on those with longer hair.
How to use it: Apply the L’Oréal Paris Advanced Hairstyle BLOW DRY IT Thermal Smoother Cream throughout your mane. This hair cream acts as a heat protectant while also smoothing frizz and flyaways. Work your blow-dryer (and pick) throughout your roots and length to add lift and body. Easy, right?
BONUS: THE BLOW-DRYER BRUSH
Ok, so we’ve covered the basic attachments, but we’re sure you’ve heard about the latest craze: the blow-dryer brush. Just as it sounds, this hair styling tool resembles a round, boar-bristle brush—the only difference is that it also dries your hair! When plugged into an outlet and turned on, air comes out of holes in the brush, allowing it to dry and style at the same time. This way, you don't have to juggle two tools—a dryer and a brush—at once. The end result is a perfect blowout with minimal effort. Pretty, neat, right? This is a great option for those who are short on time and want to blow-dry and go, rather than blow-dry their hair and use a separate hot tool to style it.
Next up: Now that you know how to use your blow-dryer attachments, let’s conquer another hot tool hot topic. Here’s How to Clean Your Hot Tools.
Saltar el slider: Default related articles
Cómo encontrar tu tono perfecto de base de maquillaje Infallible 24 Hour Fresh Wear
El sérum de ácido glicólico que tu rutina de cuidado de la piel necesita
¿Deberías lavarte el cabello antes de teñirlo?
Cómo aclarar el cabello castaño oscuro
¿Se puede usar el shampoo tonificante morado en el cabello castaño?