As glamorous as a new hair color may be, the price tag and upkeep may not be so attractive. Not to mention, getting to the salon for regular appointments has been harder than ever these days. That’s where coloring your hair at home comes in. We get it — using permanent hair dye on your strands is scary, but with the right at-home hair coloring kit and a few professional tips from a hairstylist, dyeing your hair at home is convenient and affordable. You also don’t have to do it alone thanks to the L’Oréal Paris At-Home Hair Concierge, which offers one-on-one video consultations with professional stylists. Plus, we’ve got some tips tp help you through the process. Here, check out our step-by-step guide on how to dye your hair at-home for the best results.
Step #1. Pick Your Hair Color Kit
The first and most important thing to take into account when learning how to color hair at home is to purchase the right at-home hair dye kit for your needs. If you’re looking for a permanent hair color, we recommend choosing a shade from the L’Oréal Paris Superior Preference Fade-Defying Shine Permanent Hair Color line, which has a liquid formula that will be easier to spread when coloring, as opposed to gel formulas. We also like the L’Oréal Paris Feria Hair Color line for its multi-dimensional effect that prevents your hair from looking flat and lackluster. If you’re trying to conceal gray hairs, though, try the L’Oréal Paris Excellence Créme Permanent Triple Protection Hair Color for its triple protection system that cares for your hair while offering 100 percent gray hair coverage.
Step #2. Do A Skin Allergy Test
You’ll want to follow the instructions that go with your hair color kit, but the first step in getting ready to dye your hair is to do a skin allergy test. Mix one part color and one part developer, and apply onto your elbow with a cotton swab. Wait 48 hours to ensure you don’t have an allergic reaction before committing to your full head of hair.
To prep for coloring, put on your gloves, then twist off the top of the developer and pour the color gel into it. Put the cap back on the developer, place your finger over the tip, and shake well to mix.
Step #3. Section Your Mane
Next, it’s time to section your hair. Sectioning your hair will make it easier to color your strands at home, because it will give you more control. Part your hair as you normally would, going all the way down the back of your head and effectively splitting your hair into left and right sides. Clip one side out of the way. Then, starting about midway down your part, use your comb to create another section that goes from your part, down the back of your ear, and to your ends. Clip those sections out of the way and repeat on the other side. Essentially, you’re dividing your hair into four sections.
Step #4. Start At Your Hairline
Remove the clip from one of your front sections of hair. Hold the hair back and take your time applying hair color directly to your hairline, then blend using your gloves. Don’t forget to apply your hair dye to the part too. Let down the remaining front section and apply dye to the rest of your hairline and part just as you did in the previous step. Take care to saturate your part to ensure every inch is covered! Be sure to revisit your hairline and gently pat the color to make sure it is evenly distributed, and you haven’t missed any spots.
Step #5. Work On Your Part
Leaving both front sections hanging free, begin to create sections down your part that are about a quarter-inch thick (the thicker the hair, the smaller the section). Along your part, color at the root, spread the hair dye with your thumb, and then fold that section of hair to the other side. Repeat and tilt your head as needed until you reach your ear. Flip your hair back over, then repeat this process on the remaining side of your part. Clip your front sections out of the way.
Step #6. Start On The Back
Take out the clip from one of your back sections of hair and begin by coloring along the remaining half of your part. Don’t be afraid to over-squeeze the dye, as it’ll be more difficult for you to see what you’re doing at the back of your head!
Take a horizontal section approximately at the center of your part in the back section. Color along the root, spread with your thumb, and continue down the section until you've done a third of the section. Clip the strands you colored out of the way. For the back, you can take slightly larger sections since you’ll be over-saturating. Repeat on the other back section, clipping it out of the way once done. Repeat this process, alternating between the left and right sides. Pay extra attention to the hairline along the nape of your neck, since this will be on full display whenever you wear your hair up!
Step #7. Color Your Length
The hard part of figuring out how to color hair is done. And if you just needed a quick root touch-up, you can skip this step. But if you’re coloring your hair for the first time or looking for an all-over color change, now it's time to focus on coloring your remaining length. Working with sections that are about two inches in size, apply the color, and spread from root to tip using your fingers. Start at the front and work your way toward the back. Continue to do this until your entire mane is saturated. Don’t be afraid to over-apply—your hair should be as saturated as possible to ensure even, all-over coverage.
Step #8. Wait It Out
Follow the instructions and leave the hair dye on for the allotted amount of time. Once time is up, rinse out the hair color until the water runs clear. Follow with the included conditioner. Leave it on your strands for five minutes, then rinse. No need to shampoo this time around.
Editor’s tip: When it comes to washing and conditioning your now color-treated hair, look for a sulfate-free, color-safe system, like the L’Oréal Paris EverCreme Deep Nourish Shampoo and L’Oréal Paris EverCreme Deep Nourish Conditioner because it nourishes and adds shine back to dry strands without weighing it down.
Saltar el slider: Default related articles
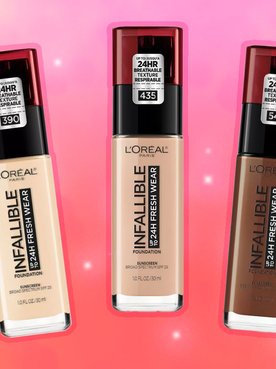
Cómo encontrar tu tono perfecto de base de maquillaje Infallible 24 Hour Fresh Wear
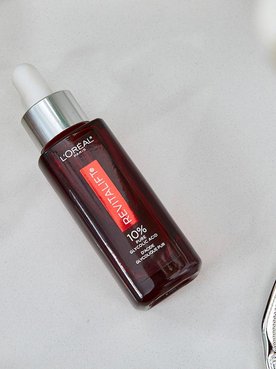
El sérum de ácido glicólico que tu rutina de cuidado de la piel necesita
¿Deberías lavarte el cabello antes de teñirlo?
Cómo aclarar el cabello castaño oscuro
¿Se puede usar el shampoo tonificante morado en el cabello castaño?