By now, you likely know all the various ways available to cleanse your skin—and more than one type of facial cleanser to do them. While you might be tempted to stick with what you know, be it clay cleansers or micellar water, there’s one option you may be overlooking because it might feel counterintuitive to cleansing: cleansing oil. The oil cleansing method has become increasingly popular, and has actually become a leading option for double cleansing. But there’s no denying that for some, cleansing and oil just feel like they shouldn’t go together. So we’re breaking down what you need to know about oil cleansing and how you can easily use it in your skin care routine.
WHAT IS OIL CLEANSING?
Oil cleansing is just what it sounds like—using a cleansing oil to rid your face of debris such as excess dirt, makeup, and yes, even oil. Rather than using surfactants as the primary ingredient to cleanse as with most traditional facial cleanser options, these cleansers are powered by oils. The oil in cleansing oil attracts the oils that are on your skin—be it excess sebum, makeup, or other impurities. Think back to grade school science and the theory of how like attracts like? That’s exactly how this works. Not to mention, cleansing oils will also help to moisturize and soften your skin.
Almost anyone can use cleansing oils. They’re a great option for all skin types, and no, they won’t make your skin oily. And as long as there are no fragrances involved, they’re even suitable for sensitive skin types.
HOW TO USE CLEANSING OIL IN YOUR SKIN CARE ROUTINE
Now that you know more about oil cleansing and how it works, you may be curious as to how to use a cleansing oil in your skin care regimen. The trick is to maximize the benefits of cleansing oil in a double cleanse routine. Check out our quick step-by-step below so you can become a pro at oil cleansing in no time.
STEP #1: PREP YOUR FACE
Most cleansing oils are best applied to damp skin but keep in mind that some are best applied to dry skin, so be sure to follow the directions on your product. If necessary, wet your face with lukewarm water to prep for your cleansing oil.
STEP #2: CLEANSE YOUR SKIN
Apply the cleansing oil to your skin, massaging it in circular motions over your face. After a few minutes, rinse thoroughly.
STEP #3: CLEANSE AGAIN
This time around, grab the L’Oréal Paris Pure-Clay Detox & Brighten Cleanser. Squeeze the cleanser into your hands and add water to transform from clay to mousse. Gently massage onto your face using circular motions, avoiding the eye area. Rinse thoroughly and pat dry.
STEP #4: APPLY A SERUM
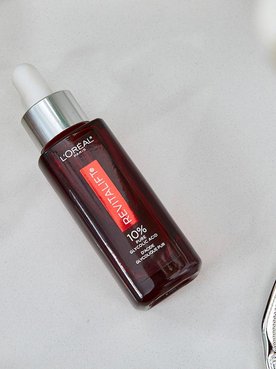
By now you know that any well-rounded skin care routine includes an effective face serum post-cleansing. Take your pick from the L’Oréal Paris Revitalift Derm Intensives serums, based on your skin concerns.
Editor’s Note: If you have dark marks try the L’Oréal Paris Revitalift Derm Intensives 10% Pure Glycolic Acid Serum, which reduces wrinkles and brightens dark spots. If you have dull skin go for the L’Oréal Paris Revitalift Derm Intensives 10% Pure Vitamin C Serum, which boosts radiance and reduces wrinkles. If you have dry skin reach for the L’Oréal Paris Revitalift Derm Intensives 1.5% Pure Hyaluronic Acid Serum, which replenishes hydration and reduces wrinkles.
STEP #5: ADD MOISTURIZER AND AN EYE CREAM
The delicate skin around your eyes deserves attention so be sure to apply the L’Oréal Paris Revitalift Triple Power Eye Treatment to depuff eyes and reduce dark circles. Then finish your routine with your pick from the L’Oréal Paris Hydra Genius line. Try either the L’Oréal Paris Hydra Genius Daily Liquid Care - Normal/Oily Skin, the L’Oréal Paris Hydra Genius Daily Liquid Care - Normal/Dry Skin, or L’Oréal Paris Hydra Genius Daily Liquid Care - Extra Dry Skin depending on your skin type.
Photo Credit: Chaunte Vaughn
Next: Is Double Cleansing Necessary?


